sales@batterydeji.com


Matters needing attention:
1, clean your hands in the process of disassembly, and then wipe the water on your hands to remove the static electricity on your hands, and pay attention to the power off operation at all times.
2, in the process of disassembly, please pay attention to the screws in the original order, so as not to install back screws due to different lengths of screws and cause damage to the motherboard.
3, please pay attention to the opening and closing Angle when separating the screen, so as not to damage the screen line.
Start a weak partner to find a professional replacement battery.
The following steps are for disassembly:
One: shut down before dismantling
1.1 Before replacing the Iphone12 Battery, turn off your mobile phone
Two: remove the screen
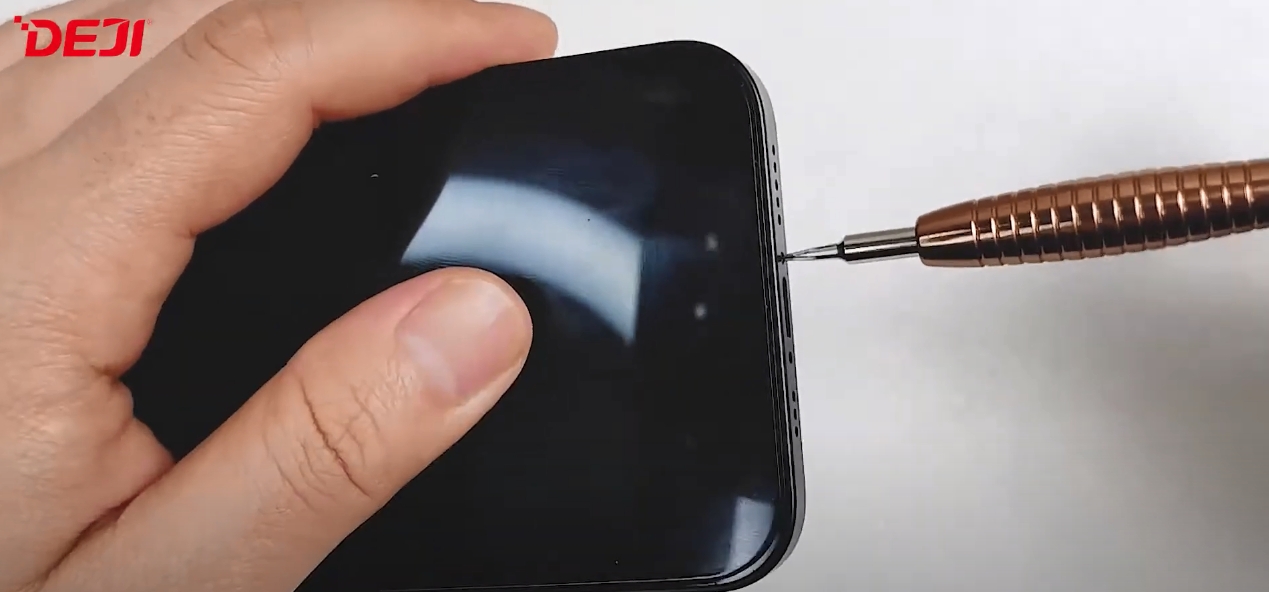
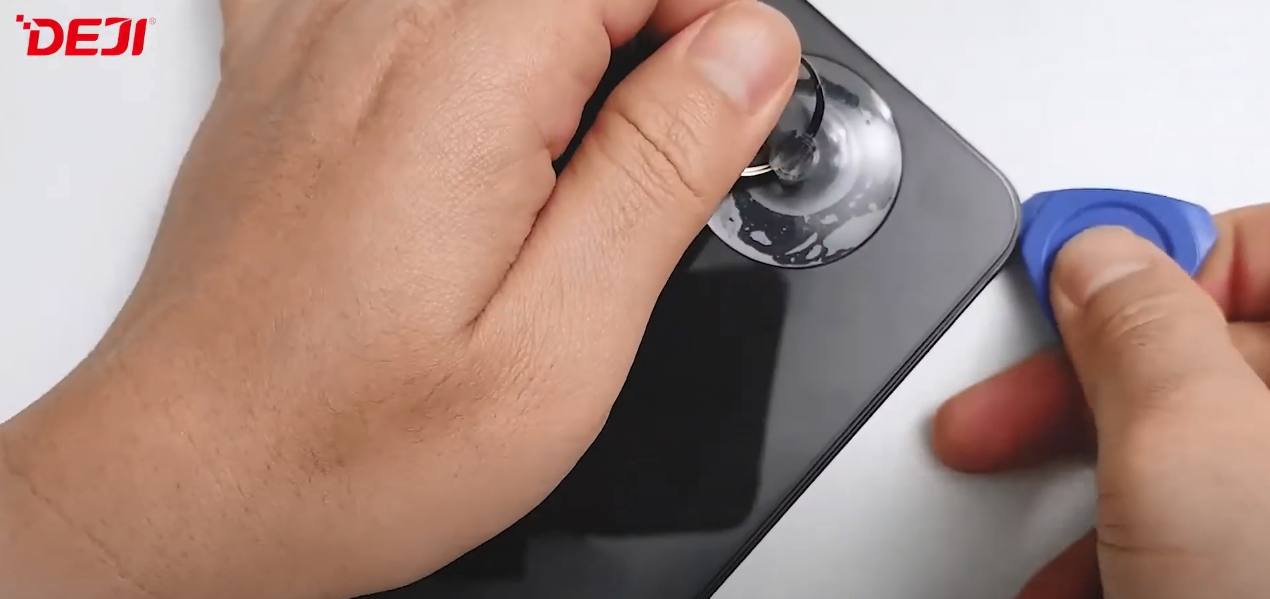
2.1 using the pentagon screwdriver remove two cents at the bottom of the screw, use hair dryer uniform heating screen around one to two minutes, surrounded by the warm, then place the suction cups in the bottom of the screen And carefully lift a gap, and then use the triangular piece of insert from aperture place apart and slide from left to right, and separation gap carefully sliding along the sides of their mobile phone screen, remove the suction cup when gap increases, Rotate the phone with the camera on the right, open the screen to the right of the phone, and make sure that the opening Angle is not greater than 90 degrees to avoid damage to the wiring.
(Note that do not touch the sensor in the red area during disassembly to avoid important damage, we can use the convenient note to block the sensor for disassembly operation)
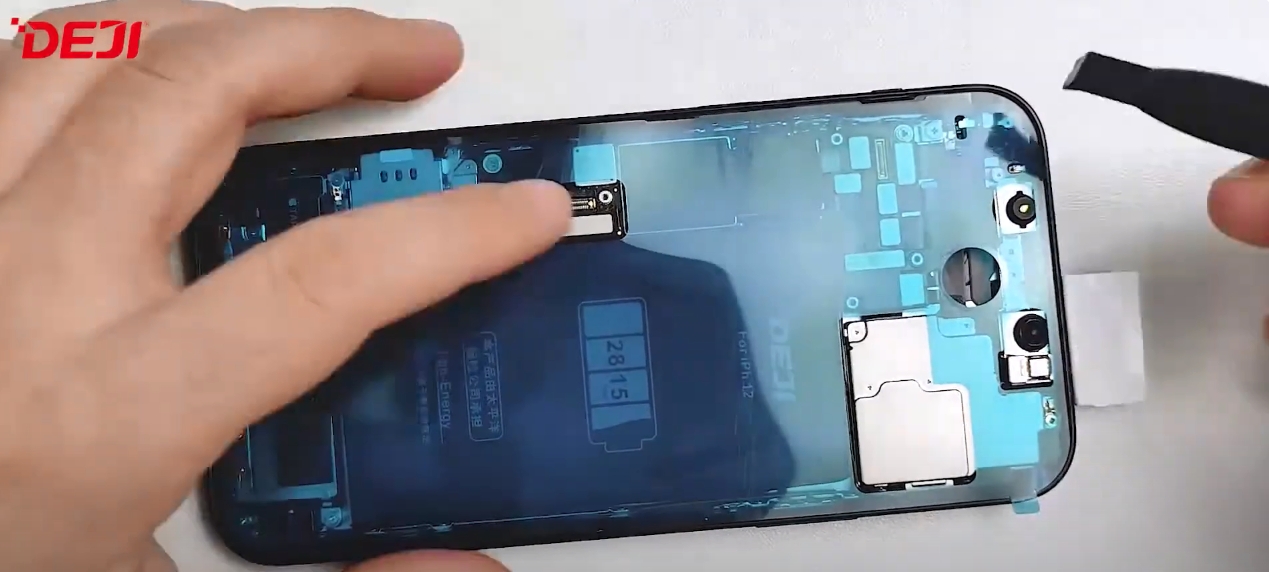
Three: remove the cover plate and screw
3.1 after open screen, with triangular screwdriver to remove the power supply cover plate of the two screws and remove the cover plate, then remove the cover plate of the four screen with a screwdriver (cover plate is card buckle design, remove note operation), first using the double-breasted lever power off power processing, and then disconnect the next two screens double-breasted suit, and then disconnect the top row of a screen button and then remove the screen
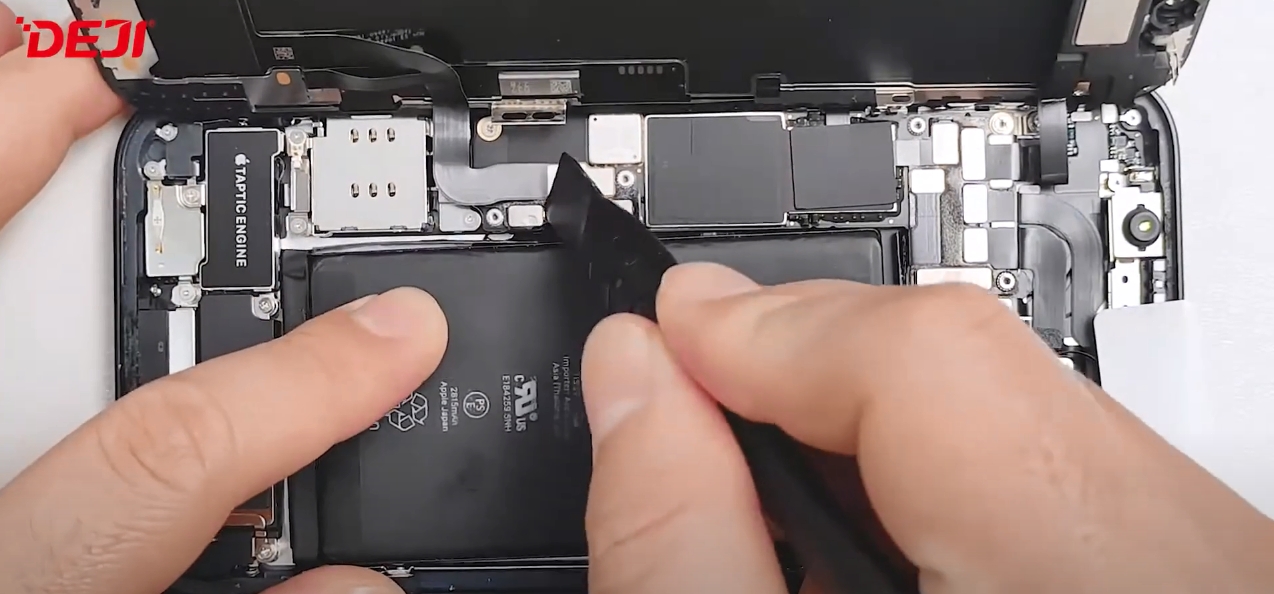
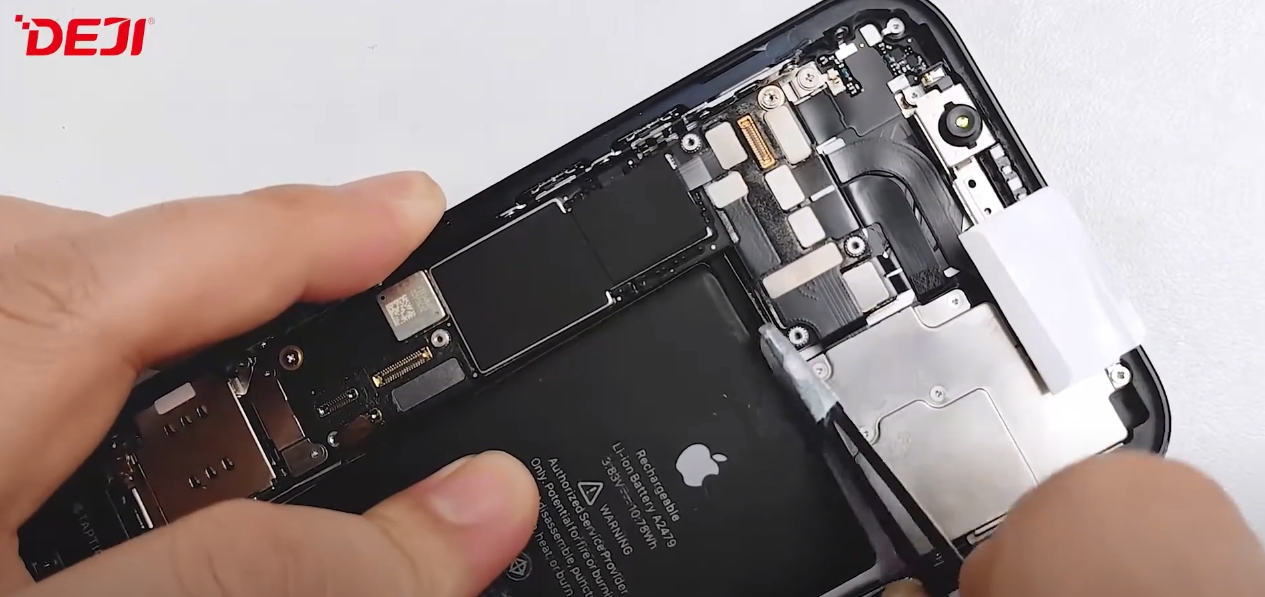
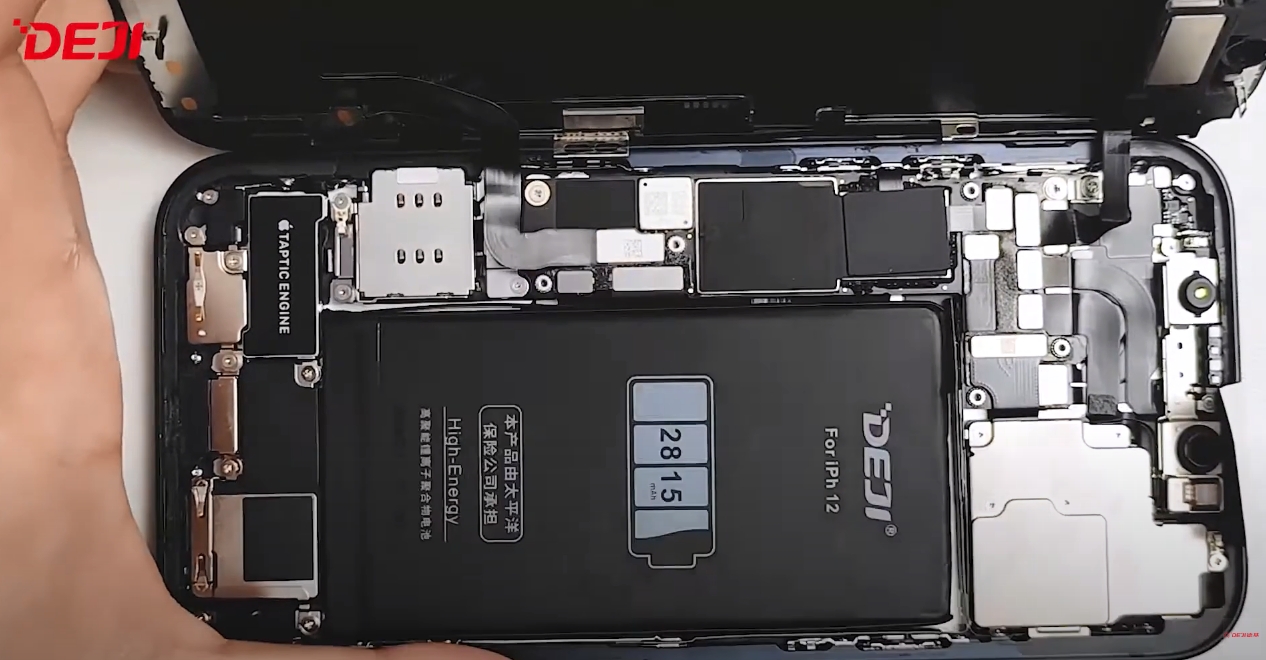
Four: remove the battery and gum
4.1 use hair dryer uniform heating at the bottom of the battery position for a minute or two to let back glue viscosity reduction, then the battery before and after the glue head start, and to use tweezers rubber smaller efforts to pull out the battery, remove the last battery adhesive with hand fixed batteries to avoid battery fly out (please pay attention to a kind of operation please don't press the motherboard countenance) induced after remove the battery plastic, remove old batteries.
Five: power test
5.1 the battery without adhesive is placed well, first the battery is stuck, and then the battery is put into the groove, and then the battery is disconnected to ensure that the power is off to install the screen, and finally the battery is connected to close the screen, and then the battery is turned on for power test.
5.2After starting up, use the charger to connect the phone and check whether it can charge normally. Meanwhile, test all functions of the phone.
Six: install battery adhesive and battery
6.1 first the new battery, in turn, pay attention to the direction, take out the battery back glue on the back, first off battery glue on both sides of the blue protection mode, and the battery adhesive on the new battery negative, torn off the battery glue behind the protection mode, the double-breasted card first, and then put the battery into the slots, and then put the double-breasted disconnect (prevent electric installation cause damage)
Seven: installation of waterproof glue
7.1, first use the pry bar to clean the waterproof glue on the edge of the fuselage, then take out the waterproof glue and confirm its position, tear the larger blue protective mold at the bottom to align with the position, stick it around with the pry bar, and finally tear the blue protective mold.
Eight: install the screen
8.1 Place the screen at 90 degrees on the right side of the shell, then fasten the three screen rows to ensure that the screen arrangement is correct, then fasten the battery power buckle, and put the cover plate in the original position. Then use the triangle screwdriver to screw back the relevant screws according to the original screw sequence, and then remove the sticker of the sensor
Nine: Close the screen
9.1 After the installation of the internal parts of the fuselage, gently press the edge of the fuselage from the left to the right. After the screen is installed, install the screws at the bottom of the phone with a pentagon-screwdriver